
Global Point Of Care
ID NOW™
Software Update
Software Update

select your language:
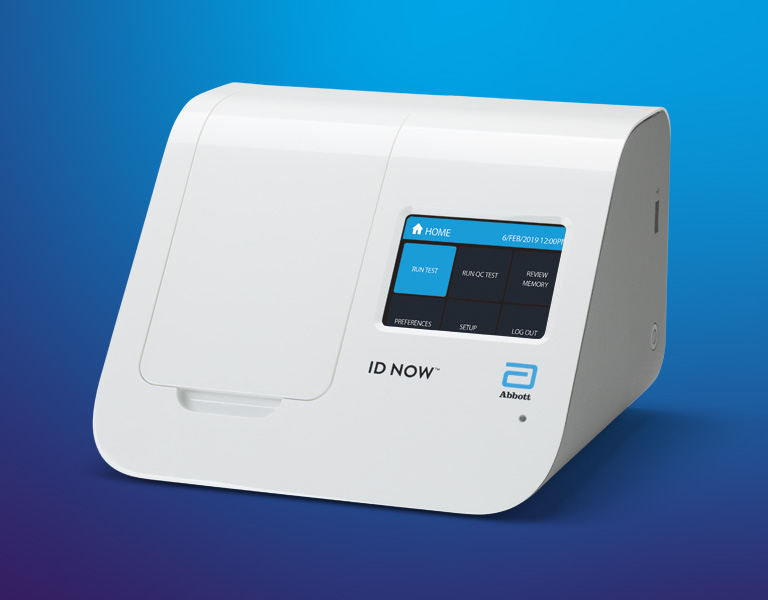
v7.3 is now available to download
Please follow these steps to download onto a USB drive and update your ID NOW™ instrument. ID NOW Software v7.0 or higher is required. Please contact Technical Support for assistance if an earlier version is installed on the ID NOW instrument.
Download Software onto USB Drive
Step 1
Select Download Now and the software will download to your computer.
Step 2
Insert a USB drive into the computer and copy the downloaded file to the USB drive. Requires empty USB with 2GB of free space.
Software Update Procedure
Step 1
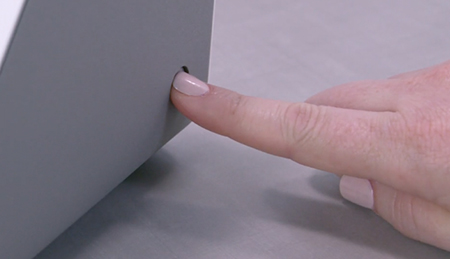
Turn the ID NOW Instrument OFF by pressing and holding the Power Button for 3-5 seconds.
Step 2
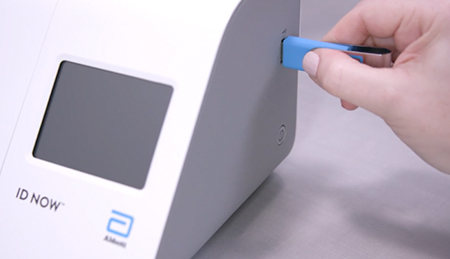
Attach USB Drive (containing downloaded files) to the instrument via the USB Connection. Wait at least 3 seconds before proceeding to Step 3.
Step 3
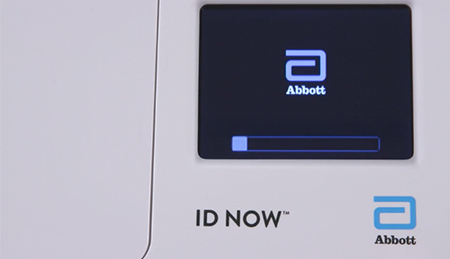
Turn the ID NOW Instrument ON by pressing and holding the Power Button for 3-5 seconds until the display on the screen is shown and the white LED on the front begins to blink. A message, “Verifying Update”, will appear about 45 seconds after turning on the ID NOW Instrument.
Step 4
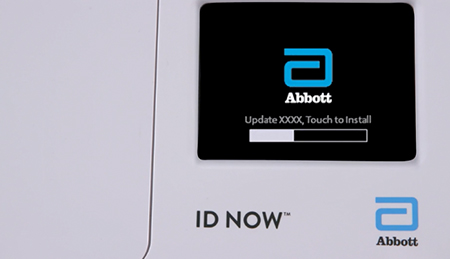
“Touch to Install” option will appear on the screen approximately 1.5 minutes after turning the ID NOW Instrument on. Touch the ID NOW display screen to begin the install. Do not remove the USB Drive.
Note: Do not log in before completing Step 5.
Step 5
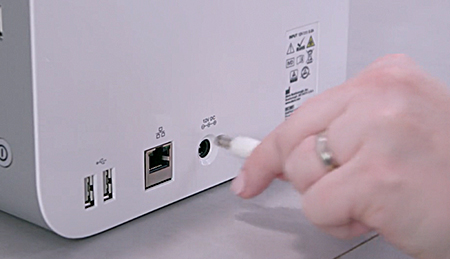
After the update has been installed, remove the power cord from the back of the ID NOW Instrument. Remove the USB drive from the side of the ID NOW Instrument. Wait 10 seconds. Reconnect the power cord to the ID NOW Instrument. The white LED on the front will blink a few times. Turn on the ID NOW Instrument. The software update is complete. The USB drive can be used again for additional ID NOW Instruments.
Note: Verify the update was successful by selecting “Preferences” > “About”
Useful Links
For Product Labeling documents, such as the User Manual and Quick Start Guide, please visit our e-IFU website.
Download the ID NOW Technical Bulletin here.
Click here for more information about how you can automatically update your ID NOW Software using POC Link POC Link Connectivity Tool for ID NOW.
Ya puede descargar la versión 7.3.
Siga estos pasos para descargarla en una unidad USB y actualizar su Instrumento ID NOW™. Se requiere la versión 7.0 o posterior del Software de ID NOW. Si tiene instalada una versión anterior en el Instrumento ID NOW, comuníquese con Asistencia Técnica para obtener ayuda.

Descargar el Software en una Unidad USB
Paso 1
Seleccione Download Now (Descargar Ahora) y el software se descargará en su computadora.
Paso 2
Inserte una unidad USB en la computadora y copie el archivo descargado en la unidad USB. Se requiere una unidad USB vacía con 2 GB de espacio disponible.
Procedimiento de Actualización de Software
Paso 1
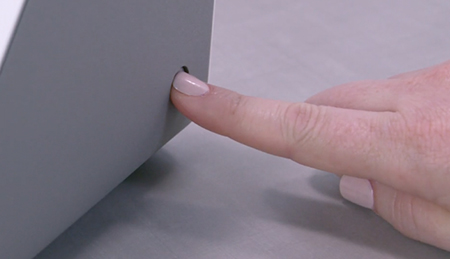
Apague el Instrumento ID NOW manteniendo presionado el botón de encendido/apagado de unos 3 a 5 segundos.
Paso 2
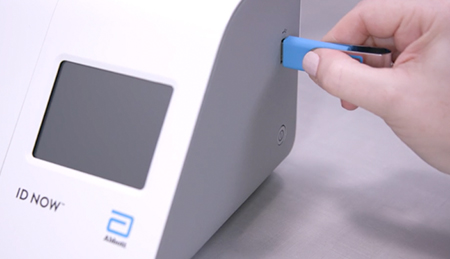
Conecte la Unidad USB (que contiene los archivos descargados) al instrumento mediante la Conexión USB. Espere al menos 3 segundos antes de continuar con el Paso 3.
Paso 3
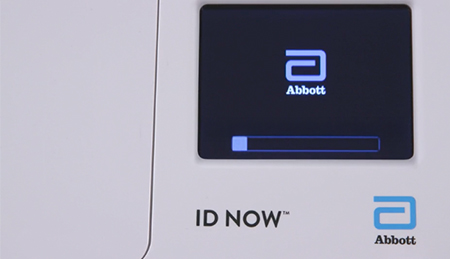
Encienda el Instrumento ID NOW manteniendo presionado el botón de encendido/apagado de unos 3 a 5 segundos hasta que se encienda la pantalla y el LED blanco de la parte delantera comience a parpadear. Aproximadamente 45 segundos después de encender el Instrumento ID NOW, aparecerá el mensaje “Verifying Update” (Verificando actualización).
Paso 4
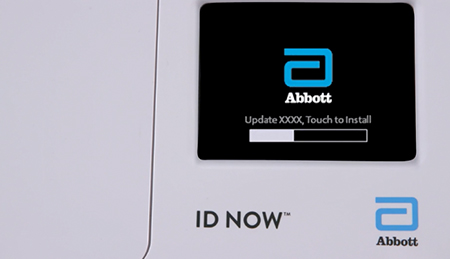
Aproximadamente 1.5 minutos después de encender el Instrumento ID NOW, aparecerá en la pantalla la opción “Touch to Install” (Pulse para instalar). Toque la pantalla del ID NOW para iniciar la instalación. No extraiga la Unidad USB.
Nota: No inicie sesión antes de completar el Paso 5.
Paso 5
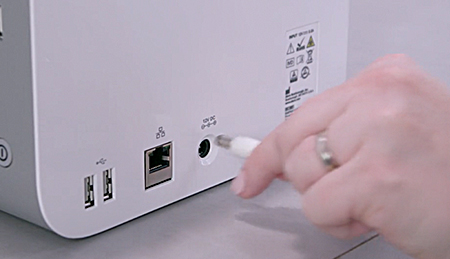
Una vez instalada la actualización, desconecte el cable de alimentación de la parte posterior del Instrumento ID NOW. Extraiga la unidad USB del costado del Instrumento ID NOW. Espere 10 segundos. Vuelva a conectar el cable de alimentación al Instrumento ID NOW. El LED blanco de la parte delantera parpadeará algunas veces. Encienda el Instrumento ID NOW. La actualización de software se habrá completado. La unidad USB se puede volver a utilizar para otros Instrumentos ID NOW.
Nota: Verifique que la actualización se haya realizado correctamente en “Preferences” (Preferencias) > “About” (Sobre).
Enlaces Útiles
Para consultar los documentos de la Etiqueta del Producto, como el Manual del Usuario y la Guía de Inicio Rápido, visite nuestro sitio web de las IFU electrónicas.
Descargue aquí el Boletín Técnico de ID NOW.
Haga clic aquí para obtener más información sobre cómo actualizar automáticamente el Software de ID NOW con POC Link.